Nature's Weavers
by Nancy Nickolson, Family Programs Coordinator, and Corey Scobie, Assistant Curator of Ornithology
July 6, 2020
Weavers have been making cloth for thousands of years, but birds have been weaving nests for much longer. If you look out your window, you might see a bird collecting supplies for their home. Amazingly, birds are quite resourceful, using all sorts of materials you wouldn’t expect.
In the Collection

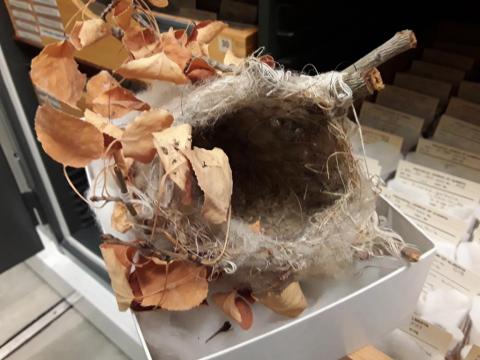
Say hello to the Baltimore oriole!
Baltimore orioles are a migratory blackbird found predominately in the Aspen Parkland ecoregion in Alberta. This bird is a true weaver of many materials. It is known for building unique hanging nests.
The nests in our collection show how this type of bird uses whatever is around to build their home. One bird; three very different nests! Let’s have a look:
String!
This bird wound string around the surrounding branches to support the hanging cup of the nest.
Found in Round Hill, AB.
Horse Hair!
Baltimore orioles build “hanging” nests, like this one made of horse hair.
Found in Glory Hills, AB.

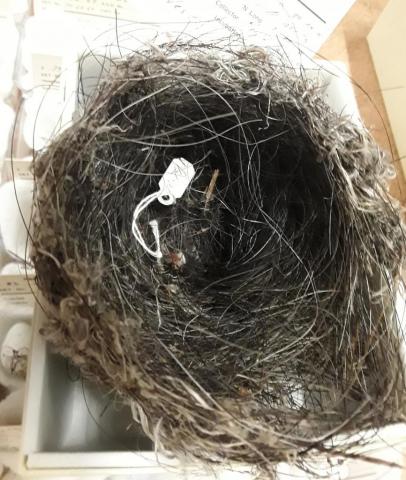
Fishing Line!
If you look closely, you’ll be able to see the fish hooks still attached to the lines! The inside of this nest would have been lined with fine and soft material, so the birds likely wouldn’t have gotten poked by the hooks. Before the nest was collected, all the natural material inside the nest decomposed or fell out.
Found in Calgary, AB.
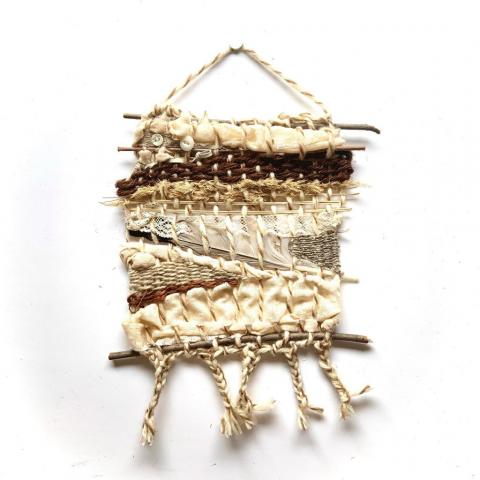
How to: Weave like a bird
Be inspired by our feathered friends! Learn how to make a simple loom and weave using found materials from in and around your home.
Difficulty: Medium
Time: Varies, depending on size of loom and materials being woven
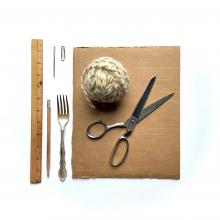
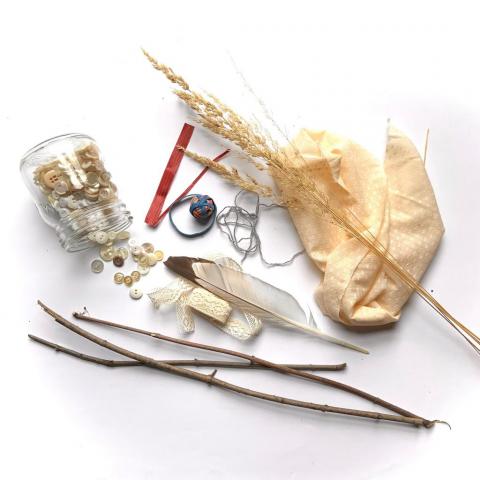
What you’ll need:
- cardboard
- ruler
- pencil
- scissors
- large blunt needle or paperclip
- yarn or string
- fork
- found objects
1. Imagine you are a bird! Search in and around your home for objects that can be woven. How about long grass, feathers, sticks, twist ties, string, fabric scraps, and elastic bands?! You could also add buttons and beads to add some shine!
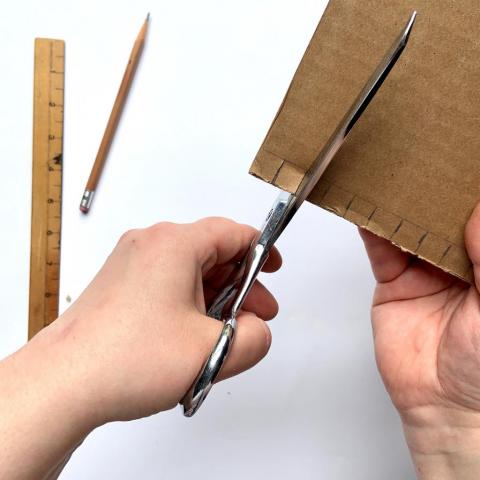
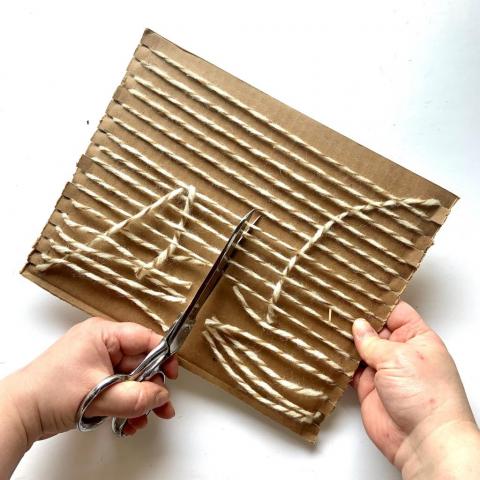
2. Raid your recycling bin for some cardboard. Your weaving will be the size of your piece of cardboard. Using the ruler and pencil, mark the cardboard every ½ inch on the top and bottom. Use your scissors to cut a ½ inch (1 cm) slit on each mark.
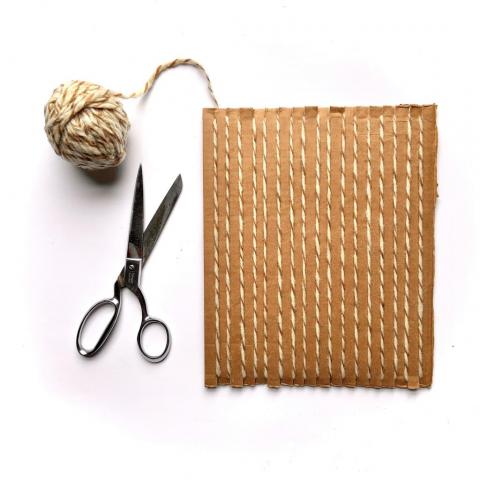
3. To create the vertical lines of your weaving (weavers call this the warp), use your yarn to wrap your loom. Start on one corner, inserting the yarn in the first notch (leaving about 6 inches (15 cm) at the back). Follow the yarn across to the notch across from the first. Wrap around the back, insert the yarn into the second notch. Continue wrapping the cardboard until all the notches have been used. On the last notch, leave another 6 inches (15 cm) at the back. Tape or tuck these ends in so they are out of the way while you work.
4. Start weaving! Each string or piece of material should be woven over and under each string, going from side to side. Use your hands, a needle, or even a paper clip to help guide the material. If you have objects that are a bit harder to weave with, you can put those in first, and then fill in the gaps with smaller, more flexible materials. Remember not to weave too tightly; this will warp your weaving.
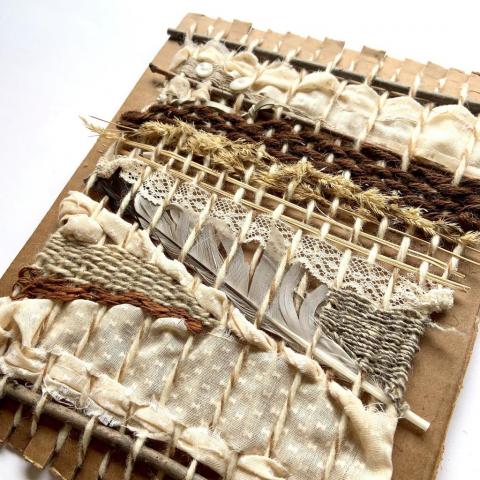
5. When you started and end with your piece of yarn, remember to tie a knot to secure it. You might also want to either trim or tuck the ends in. A fork is a useful tool to even out rows as you are working.

6. When you have filled your loom, carefully cut the yarn at the back, in the middle of each piece.
7. Then tie the ends together in any way you like. You can add knots, braids, and even beads.
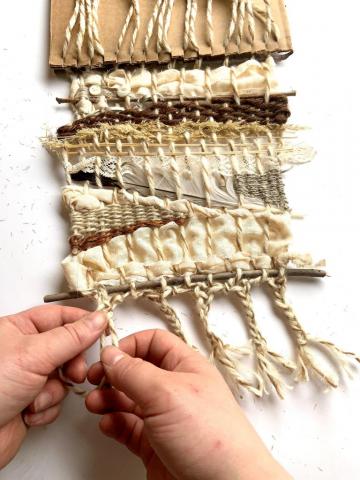
8. Enjoy your woven creation!